A Comprehensive Guide to Replacing Your Bug Zapper Bulb
Bug zappers are a must-have tool for keeping those annoying insects at bay. However, what happens when the bulb burns out? Don't worry, replacing the bug zapper bulb is actually a simple task that anyone can tackle with the right tools and a few easy steps. In this guide, we will take you through the process of replacing the bulb, ensuring that your bug zapper remains fully functional and ready to combat those buzzing nuisances. So, grab your toolkit and get ready to shed some light on the matter – you won't want to miss what's coming up next.


Imagine this scenario: you're enjoying a balmy summer evening on your porch, sipping your favorite beverage, when suddenly, an army of mosquitoes descends upon you. The air is filled with their irritating buzz, and you quickly realize that your bug zapper's bulb has burned out. Fear not, for we have the solution to your buzzing problem. By following a few simple steps, you can restore the power of your bug zapper and reclaim your peaceful evenings.
Now, let's dive into the nitty-gritty of replacing the bulb. First things first, gather your trusty toolkit. You'll need a few basic tools like a screwdriver and possibly a ladder, depending on the height of your bug zapper. With these essentials in hand, you're all set to embark on this DIY adventure.
Next, it's time to locate the bulb. Most bug zappers have a cover that can be easily removed with a screwdriver. Once you've removed the cover, you'll find the bulb waiting to be replaced. It's important to note that different bug zappers may have different types of bulbs, so make sure to check the specifications of your particular model to ensure you purchase the correct replacement.
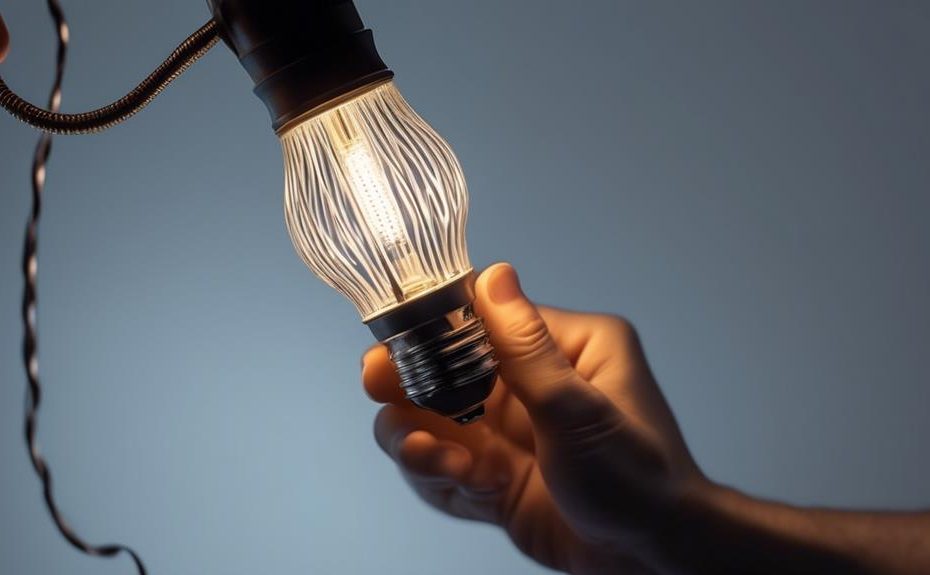
Now comes the fun part – removing the old bulb. Carefully unscrew it, being mindful of any fragile components. Once the old bulb is out, give the socket a quick inspection to make sure it's clean and free of debris. This step ensures optimal performance of your new bulb and prevents any potential issues down the line.
Now for the grand finale – installing the new bulb. Gently screw it into the socket, making sure it's snug but not overly tightened. Once the bulb is securely in place, replace the cover and give it a test run. Voila! Your bug zapper is now ready to zap those pesky insects and restore peace to your outdoor sanctuary.
In conclusion, replacing your bug zapper bulb is a simple and rewarding task that anyone can accomplish. By following these easy steps and arming yourself with the right tools, you can keep your bug zapper fully functional and ensure uninterrupted summer nights free from bothersome bugs. So, don't let a burned-out bulb dampen your outdoor experience – take charge and get ready to enjoy bug-free bliss with your trusty bug zapper.
Gather the Necessary Tools
To begin the process of replacing the bug zapper bulb, it is essential to gather the necessary tools.
Before diving into the replacement procedure, it is important to troubleshoot common bug zapper issues to ensure that the bulb replacement is indeed required. The most common issue is a burnt-out bulb, but other problems such as loose connections or faulty wiring can also affect the functionality of the bug zapper.
Regular maintenance is crucial for bug zappers to ensure their optimal performance. This includes cleaning the unit regularly to remove any debris or dead insects that may impede its effectiveness. Additionally, inspecting the wiring and connections for any signs of wear or damage is recommended.
Now, let's move on to the tools required for the bulb replacement process. Firstly, you will need a screwdriver, preferably one with a Phillips head, to remove the screws that secure the bulb cover. Additionally, it is recommended to have a pair of gloves to protect your hands from any sharp edges or potential electrical shocks. Finally, you will need a replacement bulb that matches the specifications of your bug zapper model.
Following these steps and gathering the necessary tools will ensure a smooth and successful bug zapper bulb replacement process.
Turn off the Bug Zapper
The first step in replacing the bug zapper bulb is to ensure that the bug zapper is turned off. This is crucial for your safety and to avoid any accidents during the replacement process.
To turn off the bug zapper, follow these steps:
- Locate the power source: Identify the power source of your bug zapper, which is usually a power cord connected to an electrical outlet. Unplug the power cord from the outlet to cut off the electricity supply to the bug zapper.
- Check for battery-powered zappers: If your bug zapper is battery-powered, remove the batteries from the device to turn it off. This will prevent any accidental electrical shocks while replacing the bulb.
- Disconnect solar-powered zappers: For solar-powered bug zappers, disconnect the device from its solar panel or turn off the switch to disable its functionality.
- Wait for the device to cool down: Give the bug zapper some time to cool down before proceeding with the bulb replacement. This will prevent any burns or injuries caused by handling a hot device.
Remove the Old Bulb
To replace the old bulb in the bug zapper, carefully extract the expired bulb from the designated socket. It is important to handle the old bulb with caution to avoid any potential injuries. Once the old bulb is removed, it is essential to dispose of it properly to prevent any harm to the environment and ensure safety.
Below is a table outlining common issues with bug zapper bulbs and troubleshooting tips:
| Common Issues | Troubleshooting Tips |
|---|---|
| Bulb not lighting up | 1. Check the power source and ensure it is connected properly. <br> 2. Inspect the socket for any damage or debris. <br> 3. Replace the bulb. |
| Dim or flickering light | 1. Clean the contacts between the bulb and the socket. <br> 2. Replace the bulb if cleaning does not resolve the issue. |
| Bulb burning out frequently | 1. Ensure the bug zapper is not exposed to extreme weather conditions. <br> 2. Check for any excessive voltage fluctuations. |
| Bulb shattered or cracked | 1. Use caution when handling the bulb to prevent breakage. <br> 2. Replace the bulb immediately if damaged. |
Install the New Bulb
When installing the new bulb in the bug zapper, ensure that you follow these step-by-step instructions carefully for a successful replacement.
Here are the steps to install the new bulb in your bug zapper:
- Carefully remove the new bulb from its packaging, ensuring not to touch the glass with your bare hands. Oils from your skin can reduce the lifespan of the bulb.
- Align the pins on the base of the bulb with the corresponding slots in the socket. Gently push the bulb into the socket until it is firmly seated.
- Once the bulb is in place, rotate it clockwise until it locks into position. This will ensure a secure connection and prevent the bulb from falling out during operation.
- Finally, switch on the bug zapper to test the new bulb. If the bulb does not light up, double-check that it is properly installed and the power source is functioning correctly.
Troubleshooting common bug zapper bulb installation issues:
- If the bulb is flickering or not lighting up consistently, it may be a sign of a faulty connection. Try removing and reinstalling the bulb to ensure a secure fit.
Tips for prolonging the lifespan of bug zapper bulbs:
- Clean the bug zapper regularly to remove debris and dead insects, which can obstruct the bulb's effectiveness.
- Replace the bulb at regular intervals, as recommended by the manufacturer, to ensure optimal performance.
- Consider using bug zapper bulbs with a higher wattage or UV output to attract a wider range of insects.
Test the Bug Zapper
To ensure proper functionality of the bug zapper, it is essential to conduct a thorough test to validate its effectiveness in eliminating insects. Bug zappers are designed to attract and kill insects using ultraviolet light. However, the effectiveness of bug zappers can vary depending on the model and its specifications.
Before conducting the test, it is important to understand the different bug zapper models available in the market. There are various types, including electric grid, adhesive board, and propane models. Each model operates differently and may have varying levels of effectiveness in eliminating insects.
To test the bug zapper, start by turning it on and observing its performance. Pay attention to the attraction of insects towards the device. A bug zapper that is functioning properly should attract a significant number of insects. Additionally, listen for the distinct sound of insects being electrocuted if the model has an electric grid.
Another important aspect to consider during the test is the coverage area of the bug zapper. Different models have different ranges, so it is crucial to check if the bugs are being effectively eliminated within the desired area.
Frequently Asked Questions
How Often Do Bug Zapper Bulbs Need to Be Replaced?
The lifespan of a bug zapper bulb varies depending on factors such as usage and quality. On average, they should be replaced every 3-6 months. Signs of a dying bulb include reduced effectiveness and dimming light output.
Can I Replace the Bug Zapper Bulb With Any Type of Bulb?
When considering replacing a bug zapper bulb, it is important to ensure compatibility with the device. While LED bulbs may seem appealing, specific requirements for bug zapper bulb replacement should be followed to ensure optimal performance.
Is It Necessary to Wear Protective Gloves or Goggles When Replacing the Bug Zapper Bulb?
When replacing the bug zapper bulb, it is highly recommended to wear protective gloves and goggles as safety precautions. This will help prevent any potential harm or injury that may occur during the replacement process.
How Can I Dispose of the Old Bug Zapper Bulb Safely?
To dispose of old bug zapper bulbs safely, it is crucial to follow proper recycling practices. Recycling centers or authorized electronic waste facilities can accept these bulbs for proper disposal, preventing environmental harm.
What Should I Do if the Bug Zapper Still Doesn't Work After Replacing the Bulb?
If the bug zapper still doesn't work after replacing the bulb, troubleshooting steps can be taken. These include ensuring proper installation, checking for loose connections, and verifying if the power source is functioning correctly.
Conclusion
In conclusion, replacing a bug zapper bulb is a simple process that can be done with the right tools and precautions. By following the steps outlined in this article, you can ensure the continued effectiveness of your bug zapper in eliminating pesky insects.
Just like a skilled surgeon replacing a vital organ, replacing the bulb is a precise operation that guarantees the bug zapper's optimum performance, keeping your space bug-free.