Title: Create Your Own Bug Zapper: An Essential Guide for a Buzz-Free Summer Night
Introduction:


Summertime nights should be filled with relaxation and tranquility, but all too often, they are disrupted by the irritating buzz of insects and the resulting itchy bites. It's time to reclaim your outdoor space and take matters into your own hands by crafting your very own bug zapper.
Forget about relying on commercial options when you can create a personalized device that not only keeps those pesky bugs at bay but also brings a sense of satisfaction and accomplishment. In this comprehensive guide, we will walk you through the step-by-step process of making your own bug zapper, empowering you to reclaim your outdoor haven.
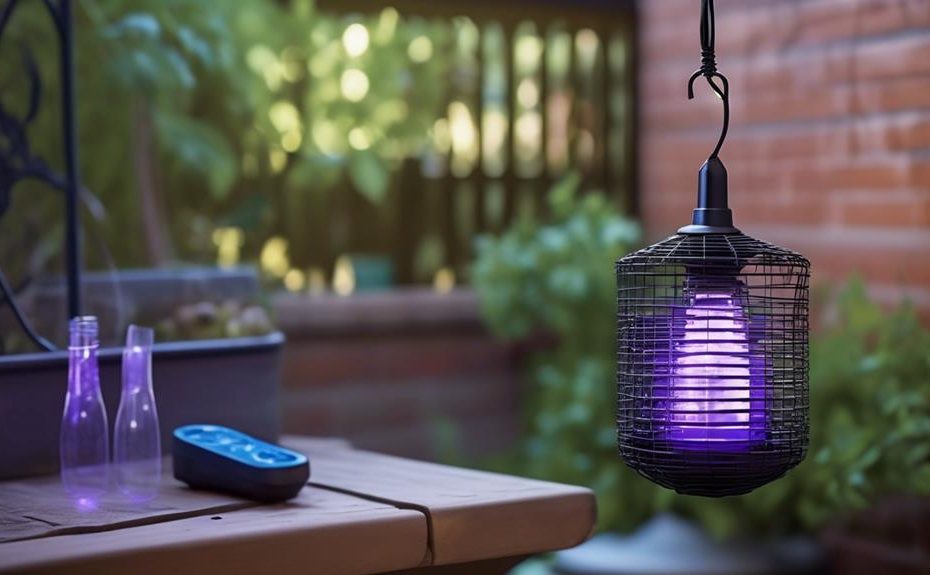
Imagine this: you're enjoying a warm summer evening on your porch, sipping your favorite beverage, when suddenly, you notice a cloud of mosquitos hovering around you. Instead of reaching for toxic sprays or expensive bug zappers from the store, picture yourself confidently activating your homemade bug zapper, watching as the insects are irresistibly drawn towards its mesmerizing glow, only to be swiftly eliminated.
Not only will this save you from countless itchy bites, but it will also provide you with a sense of accomplishment and control over your bug problem.
Now, let's dive into the exciting world of bug zapper creation. Don't worry if you're not a DIY expert – this guide is designed for beginners, using everyday language and avoiding technical jargon. It's like embarking on an adventure, where you will learn the art of crafting a bug zapper that suits your unique needs.
Along the way, we will share real-life examples and tips, making the process engaging and easy to understand.
So, whether you're a nature enthusiast, an outdoor lover, or simply tired of being bothered by insects, join us on this journey as we unlock the secrets of crafting your own bug zapper. Get ready to reclaim your summer nights and enjoy the serene ambiance you deserve.
Together, we'll create a bug-free oasis that will make you the envy of your neighborhood. Let's get started!
Gather the Necessary Materials
To begin constructing a bug zapper, it is essential to gather all the necessary materials in order to ensure a smooth and efficient assembly process. Sourcing materials is a crucial step that requires careful consideration to ensure the quality and effectiveness of the bug zapper. When selecting the materials, it is important to prioritize durability, conductivity, and resistance to environmental factors such as moisture and heat.
Commonly used materials for building bug zappers include a metal frame, wire mesh, electrical components, and ultraviolet (UV) light bulbs.
When sourcing the metal frame, it is advisable to choose a sturdy and corrosion-resistant material such as stainless steel or aluminum. The wire mesh should be made of a conductive material like copper or aluminum to facilitate the flow of electricity. Selecting high-quality electrical components, such as resistors, capacitors, and transformers, is essential for ensuring the bug zapper functions optimally.
Moreover, safety precautions must be taken into account when sourcing materials for the bug zapper. It is imperative to choose electrical components that are certified and meet safety standards to prevent electrical hazards and potential fires. Additionally, it is essential to wear appropriate personal protective equipment, such as gloves and safety goggles, while handling and assembling the bug zapper to avoid any injuries.
Build the Bug Zapper Frame
After gathering the necessary materials, the next step in constructing the bug zapper involves building the frame with careful attention to durability and functionality. Here are four key steps to consider when building the bug zapper frame:
- Material selection: Choose a sturdy and weather-resistant material such as aluminum or stainless steel for the frame. These materials enhance the bug zapper's durability, ensuring it can withstand outdoor conditions and frequent use.
- Frame design: Customize the bug zapper frame design based on your specific needs. Consider factors such as the size of the zapper, the desired placement (e.g., hanging or mounted), and accessibility for maintenance. A well-designed frame will provide stability and support to the bug zapper.
- Structural integrity: Ensure the frame is structurally sound by using appropriate reinforcement techniques. This can include adding cross-bracing, corner brackets, or welding joints for added strength. A sturdy frame is essential to prevent any damage or collapse during operation.
- Protective coating: Apply a protective coating, such as powder coating or galvanizing, to the frame to enhance its durability. This coating helps prevent corrosion and extends the lifespan of the bug zapper, especially when exposed to outdoor elements like rain or humidity.
Install the Electrical Components
The installation of the electrical components is a crucial step in the construction of the bug zapper, ensuring its proper functioning and effectiveness in attracting and eliminating insects. To successfully install these components, it is important to follow a set of safety precautions. Firstly, always make sure to disconnect the power source before working on the electrical components. This will minimize the risk of electrical shock. Additionally, wear insulated gloves and safety goggles to protect yourself from any potential hazards.
Once the safety precautions are in place, the electrical components can be installed. The table below provides a step-by-step guide on how to install the electrical components of a bug zapper:
| Step | Description |
|---|---|
| 1 | Connect the transformer to the power source |
| 2 | Attach the transformer to the bug zapper frame |
| 3 | Connect the wire to the transformer |
| 4 | Attach the wire to the bug zapper grid |
Troubleshooting tips can also be useful in case any issues arise during the installation process. If the bug zapper fails to turn on, check the power source and ensure that the transformer is properly connected. If the bug zapper is not effectively attracting insects, inspect the wire connections and make sure they are secure. Following these installation guidelines, safety precautions, and troubleshooting tips will help ensure a successful bug zapper construction.
Attract and Trap Bugs
Having successfully installed the electrical components, the next crucial step in constructing the bug zapper is to focus on the process of attracting and trapping bugs. This step is essential to ensure the effectiveness of the bug zapper in eliminating pesky insects.
Here are four key factors to consider when attracting and trapping bugs:
- Natural Bug Repellents: Incorporating natural bug repellents can enhance the bug zapper's efficacy. Certain scents and substances, such as citronella, eucalyptus, and lavender, are known to repel insects. By incorporating these repellents into the bug zapper's design, it can attract bugs while simultaneously deterring them from entering other areas.
- Ultraviolet Light: Bug zappers typically utilize ultraviolet (UV) light to attract insects. This type of light mimics the wavelengths emitted by flowers, which insects are naturally drawn to. By incorporating UV light bulbs into the bug zapper, it can effectively attract bugs towards it.
- Electric Grid: The bug zapper should have an electric grid that emits a low-level electrical charge. When insects are attracted to the UV light, they inevitably come into contact with the electric grid. The electrical charge will then zap the bugs, effectively trapping and eliminating them.
- Collection Tray: To ensure easy maintenance and cleaning, the bug zapper should include a collection tray. This tray collects the dead insects that have been zapped by the electric grid, making it convenient to empty and clean the bug zapper regularly.
Maintain and Optimize Your Bug Zapper
To ensure the continued effectiveness and longevity of your bug zapper, it is crucial to implement regular maintenance and optimization practices. Proper maintenance will ensure that your bug zapper remains in optimal condition and continues to attract and eliminate insects effectively. Additionally, optimizing the placement of your bug zapper can significantly enhance its performance. Here are some tips for effective bug zapper placement:
- Position the bug zapper at least 15-25 feet away from areas where people gather. This will help divert insects away from human activities.
- Place the bug zapper in a dark and secluded area, as insects are attracted to light sources.
- Ensure that the bug zapper is positioned at a height of 4-6 feet off the ground, as this is the level where most flying insects tend to fly.
In addition to placement, regular cleaning and maintenance are essential to keep your bug zapper running smoothly. Here's how to clean and maintain your bug zapper:
| Maintenance Task | Frequency | Description |
|---|---|---|
| Clean the collection tray | Weekly | Remove dead insects and debris from the collection tray to prevent clogging and maintain airflow. |
| Replace the UV bulbs | Annually | UV bulbs lose effectiveness over time. Replace them annually to ensure maximum bug attraction. |
| Check electrical connections | Monthly | Inspect the electrical connections for any signs of damage or loose wires. Repair or replace as necessary. |
Frequently Asked Questions
How Long Does It Take to Build a Bug Zapper?
The time required to build a bug zapper can vary depending on the complexity of the design and the skills of the builder. However, to maximize its effectiveness, one should consider tips such as proper placement and maintenance. Additionally, it is important to avoid common mistakes such as using incorrect light wavelengths or insufficient power supply.
Can I Use a Bug Zapper Indoors?
Using a bug zapper indoors can be risky due to safety concerns. However, when used properly, an indoor bug zapper can provide benefits such as reducing the population of flying insects and improving comfort in enclosed spaces.
Are Bug Zappers Harmful to Pets?
Bug zappers can pose a risk to pets due to the electrical shock they emit. It is important to take bug zapper safety precautions, such as keeping them out of reach of pets. Consider alternative methods for pest control to ensure pet safety.
How Do I Dispose of the Dead Bugs Collected by the Bug Zapper?
When it comes to disposing of dead bugs collected by bug zappers, it is important to follow proper cleaning protocols. This ensures the removal of any potential health hazards and promotes the longevity and effectiveness of the bug zapper.
Can I Use a Bug Zapper in a Rainy Environment?
The use of a bug zapper in a rainy environment may pose risks to both the device and users. It is important to consult the manufacturer's guidelines for bug zapper maintenance and consider purchasing a bug zapper from reputable brands known for their durability and weather resistance.
Conclusion
In conclusion, constructing a bug zapper requires gathering the necessary materials, building the frame, installing the electrical components, attracting and trapping bugs, and maintaining and optimizing the device.
By following these steps, you can create an effective bug zapper that will help reduce the nuisance of insects. With careful attention to detail and adherence to scientific principles, you can enjoy a bug-free environment.
So, get started on constructing your bug zapper and say goodbye to pesky bugs!