Discover the Fascinating World of Bug Zapper Schematics: How Do They Actually Work?
Bug zappers have become a hot trend, offering a fantastic solution to tackle those pesky flying insects that ruin our warm summer evenings. But have you ever wondered what makes these devices tick? How do they manage to zap those bothersome bugs out of existence?


Well, get ready to delve into the captivating world of bug zapper schematics as we uncover the secrets behind their functionality, demystify the components and wiring involved, and equip you with the knowledge and skills to create your very own bug zapper.
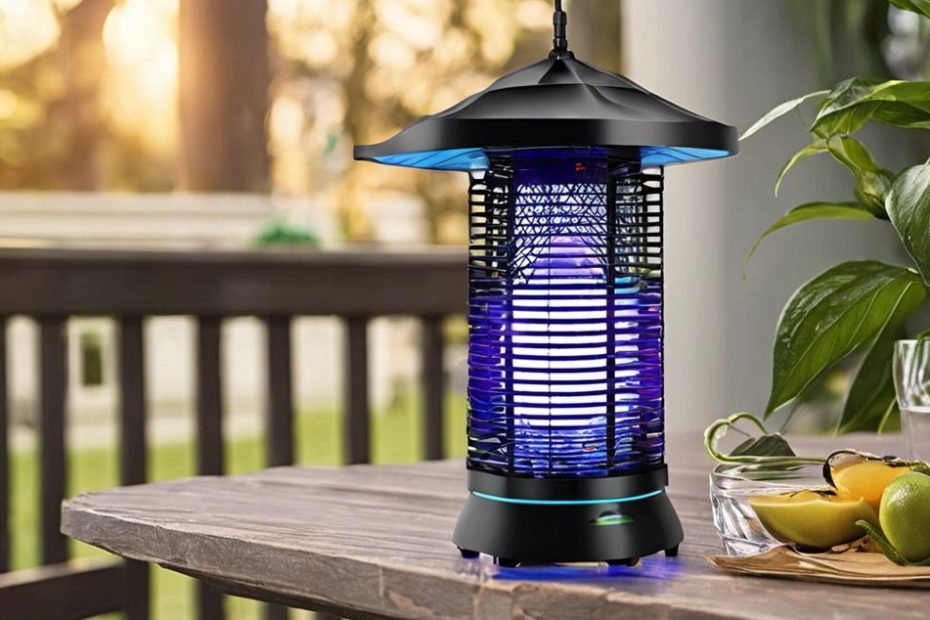
Picture this: you're enjoying a serene evening on your porch, savoring the gentle breeze and the company of loved ones. Suddenly, the tranquil atmosphere is shattered by the incessant buzzing of mosquitoes and flies. Annoying, right? That's where bug zappers come to the rescue! These ingenious devices work by luring flying insects towards a source of light, usually an ultraviolet (UV) bulb. Intrigued by the glow, the unsuspecting bugs get zapped by an electric grid or a charged metal plate, putting an end to their pestering ways.
Now, let's demystify the inner workings of a bug zapper. At the heart of this contraption lies a powerful transformer, which converts the standard voltage from your electrical outlet into a high-voltage current. This surge of electricity is what ultimately exterminates those buzzing pests.
The transformer is connected to a capacitor, which stores electrical energy and releases it in quick bursts. These rapid bursts of energy create a pulsating effect, attracting insects to the bug zapper's enticing glow.
To complete our bug zapper masterpiece, we must not forget the wires and electrical connections. These essential components ensure a smooth flow of electricity, allowing the device to function optimally. By carefully following step-by-step instructions and understanding the fundamental principles, you'll gain the confidence to assemble your own bug zapper, ready to combat those bothersome bugs.
So, whether you're a curious DIY enthusiast or simply tired of battling flying insects, this electrifying journey into the world of bug zapper schematics promises to be an eye-opening adventure. Get ready to immerse yourself in the fascinating realm of insect eradication, armed with the knowledge to construct your very own bug zapper. Let's banish those buzzing nuisances once and for all!
Understanding Bug Zapper Basics
Bug zappers are electronic devices that attract and kill insects using a combination of light and electric current. Understanding the basics of bug zapper design and their effectiveness is crucial for anyone looking to utilize these devices for insect control.
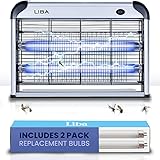
Bug zapper design typically consists of a housing, a light source, an electric grid, and a power supply. The housing is usually made of durable materials such as plastic or metal and is designed to protect the internal components from weather and physical damage. The light source is a critical element that emits ultraviolet (UV) light, which is highly attractive to many insects. The electric grid, composed of charged metal wires or grids, is strategically placed around the light source. When insects are drawn to the light, they come into contact with the electric grid and are electrocuted by the high voltage. The power supply, usually in the form of batteries or a direct electrical connection, provides the necessary electrical current for the bug zapper to function.
The effectiveness of bug zappers in eliminating insects largely depends on several factors. The attractiveness of the light source, specifically the wavelength and intensity of the UV light emitted, plays a significant role in luring insects towards the device. Additionally, the placement of the bug zapper is crucial, as it should be positioned in areas where insect activity is high and where it won't compete with other light sources. The size and design of the electric grid also contribute to the effectiveness of bug zappers, as a larger grid with closer wire spacing can increase the chances of insects coming into contact with it.
Choosing the Right Components
When it comes to choosing the right components for a bug zapper schematic, there are several key considerations to keep in mind.
Component selection plays a crucial role in the overall performance and effectiveness of the bug zapper.
Factors such as voltage requirements, power consumption, and optimal component pairings must be carefully evaluated to ensure the bug zapper operates efficiently and successfully eliminates insects.
Component Selection Tips
When designing a bug zapper, it is crucial to consider component compatibility and cost-effective alternatives. Component compatibility ensures that all the components in the schematic work together efficiently and effectively. It is important to select components that are compatible with the power requirements and voltage levels of the bug zapper.
Additionally, considering cost-effective alternatives can help reduce the overall cost of the bug zapper without compromising its functionality. This involves researching and comparing different brands, models, and prices of the components to determine the most cost-effective options.
Key Considerations
Component selection is a critical process in designing a bug zapper schematic, necessitating meticulous consideration of various factors to ensure optimal performance and cost-effectiveness. To achieve an efficient bug zapper design, the following key considerations should be taken into account:
- Voltage: Selecting the appropriate voltage level is crucial to ensure the bug zapper can effectively attract and kill insects without causing harm to humans or animals.
- Capacitance: Choosing the right capacitance value is essential for storing and releasing electrical energy efficiently, which directly impacts the bug zapper's effectiveness in attracting insects.
- Resistance: Determining the optimal resistance value helps regulate the flow of current through the bug zapper, preventing excessive power consumption and potential damage to the circuit.
- Inductance: Proper selection of inductance values aids in creating a magnetic field that enhances the bug zapper's ability to attract insects.
Optimal Component Pairings
To ensure optimal performance and functionality of the bug zapper schematic, careful consideration must be given to selecting the appropriate components that work together harmoniously. Component compatibility plays a crucial role in determining the overall effectiveness of the bug zapper circuit design.
Each component, including resistors, capacitors, transistors, and diodes, must be chosen based on their electrical characteristics and how they interact with one another. For instance, the resistance values of the resistors should be selected to ensure proper current flow and voltage division.
Capacitors, on the other hand, should have the correct capacitance and voltage ratings to store and release electrical energy effectively. Transistors and diodes must be chosen based on their specific functionalities and compatibility with the circuit design.
Step-by-Step Assembly Instructions
The assembly process for the bug zapper follows a precise and detailed step-by-step procedure. To ensure a successful assembly, it is important to follow the instructions carefully and employ proper assembly techniques.
Here are the steps to assemble the bug zapper:
- Step 1: Gather all the necessary components and tools, including the bug zapper circuit board, resistors, capacitors, diodes, transistors, and soldering iron.
- Step 2: Begin by carefully placing the components on the circuit board according to the provided schematic diagram, ensuring that each component is oriented correctly.
- Step 3: Use the soldering iron to carefully solder each component onto the circuit board, ensuring a strong and secure connection.
- Step 4: Once all the components are soldered, inspect the board for any potential issues such as solder bridges or cold joints. Use troubleshooting techniques such as visual inspection and continuity testing to identify and rectify any problems.
Following these assembly instructions and employing proper assembly techniques will ensure that the bug zapper is assembled correctly and functions as intended. Remember to take your time and double-check each step to avoid any potential issues.
Wiring and Circuit Diagrams
When it comes to wiring and circuit diagrams for a bug zapper, understanding the components and connections is crucial.
A detailed schematic diagram will provide a clear visual representation of how the different parts of the circuit are connected and interact with each other.
Additionally, exploring various power supply options and troubleshooting tips will ensure the bug zapper functions efficiently and effectively.
Components and Connections
The arrangement of components and their corresponding connections is crucial in creating an efficient bug zapper circuit. Proper component selection is essential to ensure the bug zapper functions optimally. Use high-quality components: Selecting reliable components that can handle the desired voltage and current is important for the bug zapper's performance and longevity.
Follow the circuit diagram: Refer to the schematic diagram provided to ensure correct placement and connections of each component.
Use proper wire gauges: Choose wires with appropriate gauges to handle the current flow without overheating or voltage drops.
Connect components securely: Use proper soldering techniques and ensure all connections are secure to prevent any loose or intermittent connections.
Power Supply Options
To ensure a reliable power supply for the bug zapper circuit, careful consideration must be given to the wiring and circuit diagrams.
When it comes to battery options, the bug zapper can be powered by a standard 9-volt battery or by multiple AA batteries connected in series to provide the necessary voltage. It is important to select batteries with sufficient capacity to ensure a longer operating time.
Alternatively, solar power can be utilized as a more sustainable and environmentally friendly option. In this case, a solar panel can be connected to the bug zapper circuit to convert sunlight into electrical energy. This method requires an appropriate solar charge controller to regulate the voltage and current, ensuring optimal performance and prolonging the battery life.
The wiring and circuit diagrams should be designed to accommodate the chosen power supply option, providing a stable and efficient power source for the bug zapper.
Troubleshooting Tips
If troubleshooting issues arise with the wiring and circuit diagrams of the bug zapper, it is important to follow a systematic approach in order to identify and resolve any potential problems. Here are some common issues that may occur and some problem-solving techniques to address them:
- Loose connections: Check for any loose or disconnected wires and ensure they are properly secured.
- Short circuits: Inspect the wiring and circuitry for any signs of damage or exposed wires that could be causing a short circuit. Repair or replace any damaged components.
- Incorrect wiring: Double-check the wiring diagram to ensure all connections are made correctly according to the schematic. Correct any wiring mistakes if necessary.
- Faulty components: Test each component using a multimeter to ensure they are functioning properly. Replace any faulty components as needed.
Testing and Troubleshooting

Upon completion of the bug zapper schematic, the next step involves thorough testing and troubleshooting to ensure its proper functionality. Testing techniques are crucial in identifying any potential issues and ensuring the bug zapper operates as intended.
One common testing technique is the use of a multimeter to measure voltage and current levels at various points in the circuit. This helps to verify that the power supply is providing the correct voltage and that components are receiving the necessary current. Additionally, an oscilloscope can be used to examine waveforms and identify any abnormalities.
During testing, it is important to check for common issues that may arise. These can include loose connections, damaged components, or incorrect wiring. Loose connections can lead to intermittent functionality or complete failure, while damaged components may need to be replaced. Incorrect wiring can cause short circuits or improper functioning of the bug zapper.
Troubleshooting is an essential part of the testing process. It involves identifying and resolving any problems that may arise during testing. This can be done by systematically checking each component, tracing the flow of current, and verifying connections. By following established troubleshooting techniques, such as dividing the circuit into sections and testing each one individually, any issues can be quickly identified and resolved.
Safety Precautions and Maintenance Tips
After completing the testing and troubleshooting phase, it is imperative to prioritize safety precautions and maintenance tips when working with the bug zapper schematic. This will ensure the longevity and effectiveness of the bug zapper, while also keeping you safe during the process.
Here are some important safety precautions and maintenance tips to follow:
- Wear protective gear: Always wear appropriate protective gear, such as gloves and safety glasses, when working with the bug zapper schematic. This will protect you from any potential electrical shocks or injuries.
- Follow a maintenance schedule: Create a regular maintenance schedule for your bug zapper to keep it in optimal condition. This may include regular cleaning, checking for loose connections, and replacing any worn-out components.
- Handle with care: When handling the bug zapper schematic, make sure to do so with care. Avoid rough handling or dropping the components, as this can cause damage and affect the functionality of the bug zapper.
- Disconnect power before maintenance: Before performing any maintenance on the bug zapper, always disconnect the power supply to prevent any accidental electric shocks. This is a crucial step to ensure your safety.
Frequently Asked Questions
Can Bug Zappers Be Used Indoors?
Bug zappers can be effective for indoor use in controlling flying insects. However, due to safety concerns and potential noise, alternative methods such as sticky traps, ultrasonic devices, and proper sanitation practices should also be considered.
How Often Should the Bulbs in a Bug Zapper Be Replaced?
The lifespan of bulbs in bug zappers is influenced by factors such as usage, environmental conditions, and bulb quality. To ensure optimal performance, it is recommended to replace bulbs every 3,000 to 4,000 hours of use as part of regular bug zapper maintenance.
Can Bug Zappers Attract Beneficial Insects Like Bees and Butterflies?
Bug zappers are effective at attracting and killing insects, but they can also impact the ecosystem by inadvertently attracting and killing beneficial insects like bees and butterflies. This can disrupt the natural balance of the ecosystem.
Are Bug Zappers Safe to Use Around Children and Pets?
When considering the safety of bug zappers around children and pets, it is crucial to take appropriate safety precautions. However, it is worth exploring bug zapper alternatives that are less harmful to our loved ones.
Can a Bug Zapper Be Used in Areas With Heavy Rain or Extreme Temperatures?
In areas with heavy rain or extreme temperatures, the usage of a bug zapper may be affected. The effects of heavy rain could potentially damage the zapper, while extreme temperatures may impact its functionality.
Conclusion
In conclusion, the bug zapper schematic provides a comprehensive guide for understanding, assembling, and maintaining a bug zapper device. By following the step-by-step instructions and utilizing the appropriate components, users can effectively eliminate pests while ensuring safety precautions.
Just like a well-designed bug zapper attracts and eliminates insects, this schematic serves as a reliable tool to combat unwanted pests and create a comfortable environment.